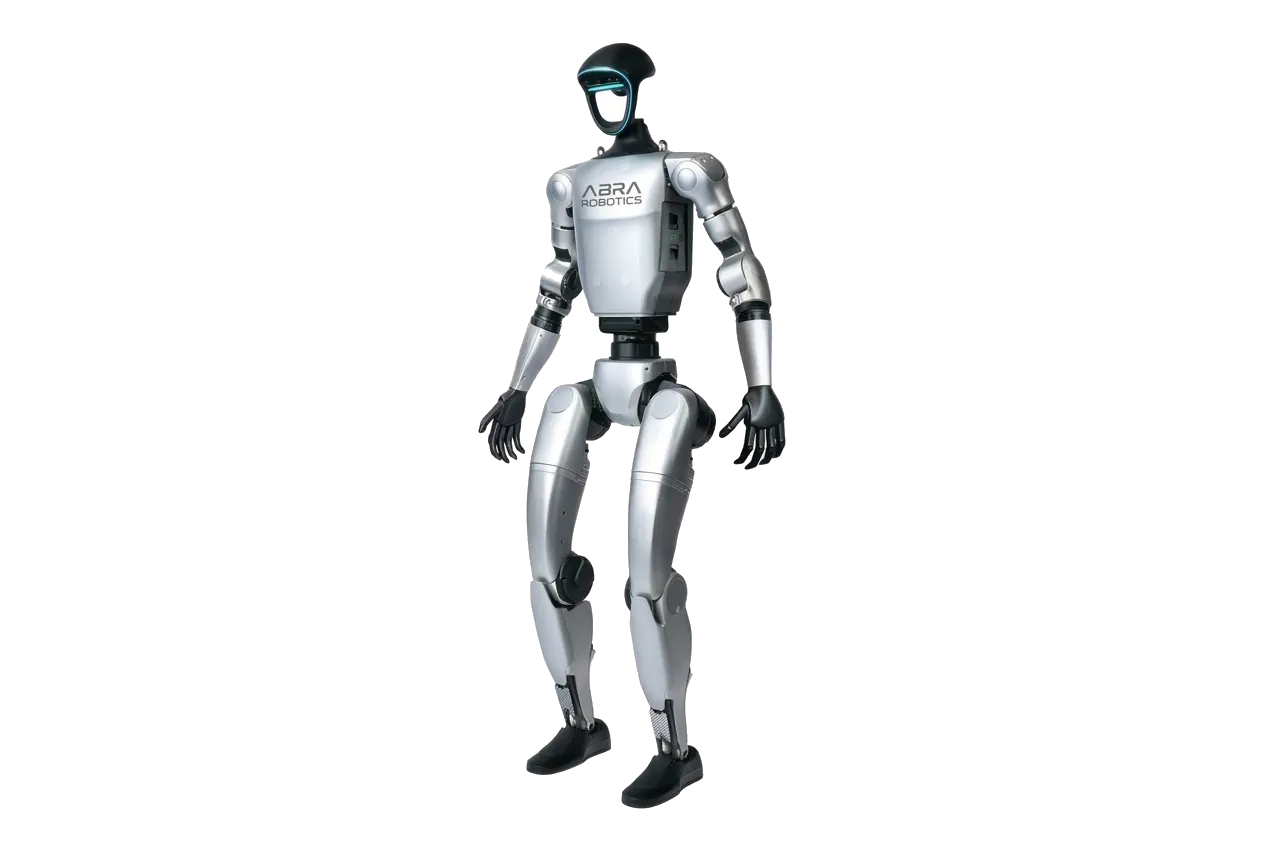
G1 EDU variants (U1–U10)
Unitree price-list codes. The difference between the models is the mechanical base (23 or 29 DoF) and the manipulator fitted. The G1 Air does not support secondary development: in the official Unitree table this item is present only for the G1 EDU.
| SKU | DoF | Manipulator | Product page |
|---|---|---|---|
| G1 Air | 23 | Dummy (non EDU) | Air |
| G1-U1 | 23 | Dummy hands, Jetson Orin NX | U1 |
| G1-U2 | 29 | Dummy + 3 DoF waist + 7 DoF arm | U2 |
| G1-U3 | 43 | Dex3-1 three fingers, no tactile | U3 |
| G1-U4 | 43 | Dex3-1 three fingers, with tactile | U4 |
| G1-U5 | n/a | Inspire RH56DFQ, no tactile | U5 |
| G1-U6 | n/a | Inspire RH56DFTP, with tactile | U6 |
| G1-U7 | 37 | Revo2 Basic (5 fingers) | U7 |
| G1-U8 | n/a | Revo2 Touch (5 fingers, with tactile) | U8 |
| G1-U9 | 37 | Dex3-1 no tactile (compact config) | U9 |
| G1-U10 | 35 | Revo2 Basic (5 fingers) | U10 |
Prices are in the public price list. To choose between the versions there is the which G1 to choose guide; if the work is at a desk, also look at the G1-D.
Physical protection of the robot
R3 remote control
Power on: short press on the power button → hold for ≥2 s (two beeps). Power off: short + long ≥2 s (three beeps).
Remote included or available separately: G1 Remote Controller.
Remote commands (current firmware)
The combinations can change with the firmware version: always check the sticker on your remote before using the robot.
Command legend printed on the R3 remote:
- ★ = single short press
- ▲ = long press ~2 seconds (in motion control, holding the damping L2 + B for 5 seconds enters damping protection, as shown on the sticker)
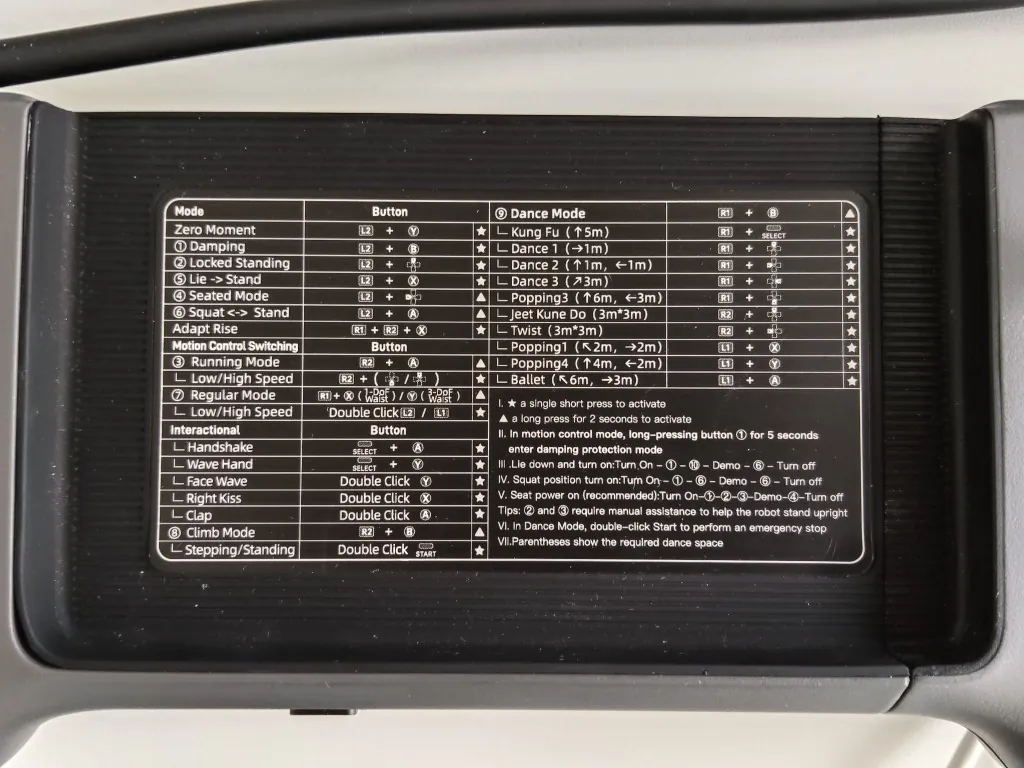
Zero moment / posture
| Command | Keys | Type |
|---|---|---|
| Zero moment | L2 + Y | ★ zero torque, free joints: if the robot is not suspended it falls |
| Damping | L2 + B | ★ damps the motors: this is the command to stop the robot |
| Locked standing | L2 + ↑ | ★ standing with locked joints |
| Getting up from lying down | L2 + X | ★ Lie → Stand (hard floor only, see protection) |
| Sitting | L2 + ← | ▲ wait for transition |
| Squat ↔ stand | L2 + A | ▲ |
| Adapt rise | R1 + R2 + X | ★ |
Motion control
| Mode | Keys | Notes |
|---|---|---|
| Running mode | R2 + A | ▲ 2 s (running / aggressive motion) |
| Low/high speed (run) | R2 + ↑ / ↓ | ▲ |
| Regular mode (1 DoF waist) | R1 + X | ▲ 2 s stable walk mode (G1-U1 / 1 DoF waist) |
| Regular mode (3 DoF waist) | R1 + Y | ▲ 2 s stable walk mode (G1-U2+ / 3 DoF waist) |
| Low/high speed (regular) | Double click L2 / L1 | ▲ |
| Stepping / standing | Double click START | ▲ |
| Climb mode | R2 + B | ▲ |
Debug mode (SDK development only)
L2 + R2 stops the motion controller to avoid conflicts with the SDK; with L2 + A you verify that you are in debug mode (source: Unitree, remote control). It is only needed in the lab when you program motors at low level. For normal use with the remote, do not enter debug mode: restart the G1 to exit.
Recommended power-on sequences (from the sticker)
- From sitting (recommended): Power on → (1) Damping → (2) Locked standing → (3) Running/Regular → demo → (4) Sitting → power off. Steps (2) and (3) with manual assistance behind.
- From lying down: Power on → (1) → (10) → demo → (6) → power off.
- From squat: Power on → (1) → (6) → demo → (6) → power off.
Powering on the G1 battery
- Insert the battery until it clicks (switch towards the rear).
- Short press on the button → hold for ≥2 s.
- Wait ~1 min: all joints in zero torque.
- Follow the remote sequence above: first the damping (L2 + B), then proceed.
Suspended on the frame method (lab)
Recommended at the first power-on: protection frame. Suspend the robot, feet on the ground only after stabilising in Regular mode. Arms and legs free, no cables under tension.
Ground method (L2+X)
Payload and arms
Unitree states a maximum load per arm of about 3 kg on the G1 EDU (about 2 kg on the base G1) and specifies that it varies a lot with the arm posture (G1 page). In practice, with the arm extended even 1 kg can unbalance the robot forward and disturb walking. For greetings and gestures, do not load the arms.
Battery and autonomy
According to Unitree the G1 carries a quick-release smart battery of 9000 mAh for about 2 hours of autonomy. The real value drops with continuous walking and loads on the arms.
- For a full day of tests you need at least two batteries: the extra G1 battery is listed at €925.83 and the charger at €188.87 (excluding VAT).
- Switch the robot off before replacing the battery and put it back in damping before making it stand.
- Keep the R3 remote charged too: without the remote you have no quick way to stop the robot.
Network and SSH
Bring the PC onto the subnet 192.168.123.0/24 with a free static IP (e.g. .51; do not use .161, .164, .120). The PC1 (.161) runs the Unitree motion control and is not open to developers; development is done on the PC2 (.164).
- Direct Ethernet to the G1 LAN port
- Wi-Fi: according to the LeRobot documentation, on the PC2 the Wi-Fi is disabled by default and must be enabled by hand; to install packages you can share the PC connection via Ethernet.
192.168.123.161MCU / Unitree motion controller192.168.123.164Jetson Orin (PC2), SSH unitree / 123192.168.123.120LiDAR Livox MID-360 (head)ping 192.168.123.164
ssh unitree@192.168.123.164
# Default password: 123unitree / 123 are the default credentials also reported in the LeRobot documentation. Unitree says to ask support for the initial credentials, so on some units they can be different. After the first access change the password, especially if the robot joins the corporate network.
H2: uses the same 192.168.123.x subnet, with a PC1 for control (Intel Core i5) and a PC2 for development (Intel Core i7 on the EDU version, according to the Unitree page). The exact addresses depend on the configuration: check them in the delivery documentation.
Common problems
- Ping does not respond → check the Ethernet cable and the PC IP, then restart the robot.
- SSH does not connect / is slow → saturated SSH sessions or saturated Jetson → restart the G1.
- The SDK makes the joints tremble → motion controller active in parallel, or double command (remote + SDK together). Enter debug mode only for development, or stop the SDK commands.